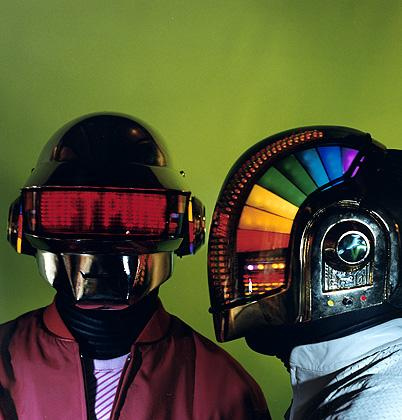
My first true lighting project was a night light for my son Owen. That was practice for my next project; a Thomas Bangalter (one half of the French house music duo Daft Punk) helmet. I’ve been a long time lurker on the RFP, and this helmet is a grail prop for me to build. This will be my first ‘wearable’. Luckily for me there’s a whole community of Daft Punk prop builders out there to draw information from. My build will be a hybrid of the best techniques I’ve seen, while use modern tools and off the shelf hardware where I can to keep costs on budget. I will be starting on the hardware/electronics first. Most builds I’ve seen gloss over the code to run this helmets. Since I’m a front end developer by trade, I’m hoping I’ll be able to doing something that hasn’t been done before…but even if it has been done, it hasn’t be done by me.
A large part of this build will rely on 3D printing. A lot of the models here could be fabricating easily with little finishing work using SLS or Polyjet 3D printing. These methods are prohibitively expensive for large pieces. In order to keep costs low, I will be using a ‘fused deposition modelling’ or ‘FDM’ with a Prusi i3 printer. I will also be employing a number of different finishing techniques, like acetone welding, XTC-3D coating, high build primer, glazing putty and sanding to achieve the same finish as more expensive 3D printing methods.
Credit goes out to Harrison Krix of Volpin Props, Tekparasite, Bruno Osti (for the helmet Pepakura file), theRPF and Daft Club communities for providing a lot of the ground work for us Daft builders.
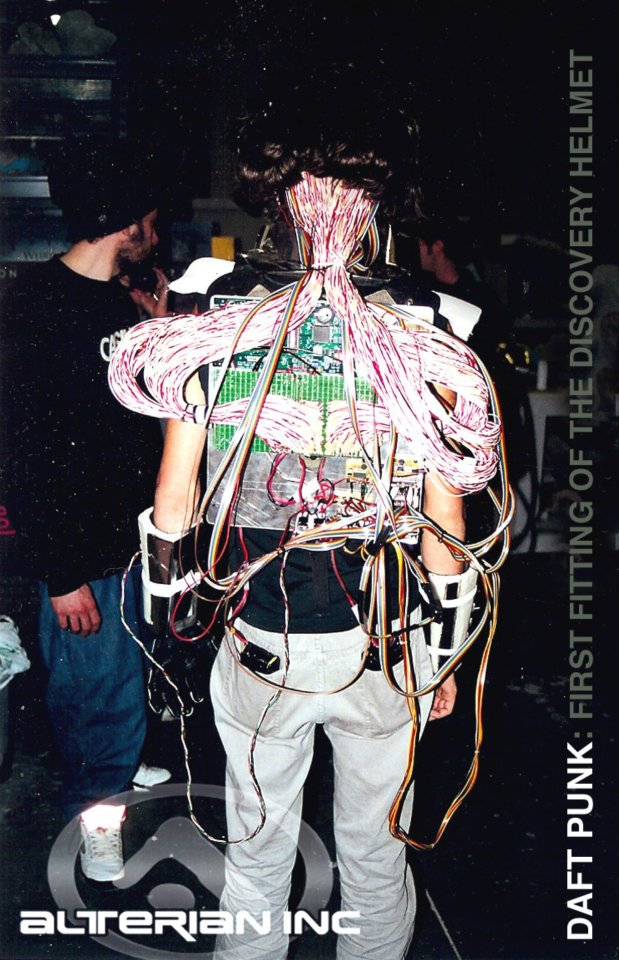
One obscure piece of hardware from Daft Punk’s Discovery Era were optional gauntlets, that were used to control helmet animations. They had illuminated buttons and communicated via serial UART interface to backpacks that contained the chaser circuits. There are only about 10 photo references and one or two 240p videos that show them. I haven’t seen any prop builders attempt to replicate them. I think they’re pretty cool.
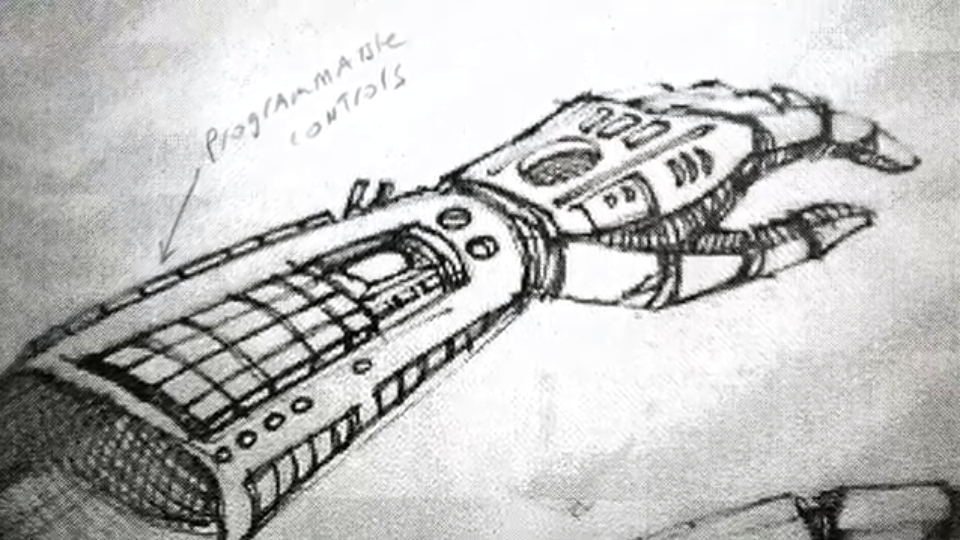
Early concept art of the gauntlets.
I’m building my own functional, wearable control gauntlets that communicate with my Thomas sub-visor, temple EQs, ear pucks and fans.
Why build gauntlets when I can already communicate with my helmet via Bluetooth LE and my smart phone? There’s something about the tactile nature of knobs and buttons as controllers that makes them more appealing over a touch screen. It will give me the opportunity build upon my existing digital fabrication skills. I will also need to learn about analog/digital multiplexing, as the number of analog input pins on an Arduino UNO is limited.
Not much is known about the Discovery control gauntlets, which give me the option to add my own interpretation. From all the reference material I’ve seen, I count 5 potentiometers/rotary switches and 24 tactile buttons. I (and others) suspect that the some of the sensors on the original gauntlets may have just been for show, and not functional at all. At the very least, my version of the gauntlets will control helmet animations and fans. At the very most, they will do something more interesting like midi control, guitar distortion or some sort home automation. They will have four removable face plates, that will make them highly customizable. They will have a dedicated Arduino, that communicates via I2C synchronous serial protocol.
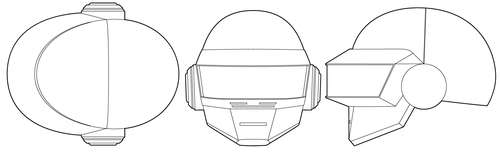
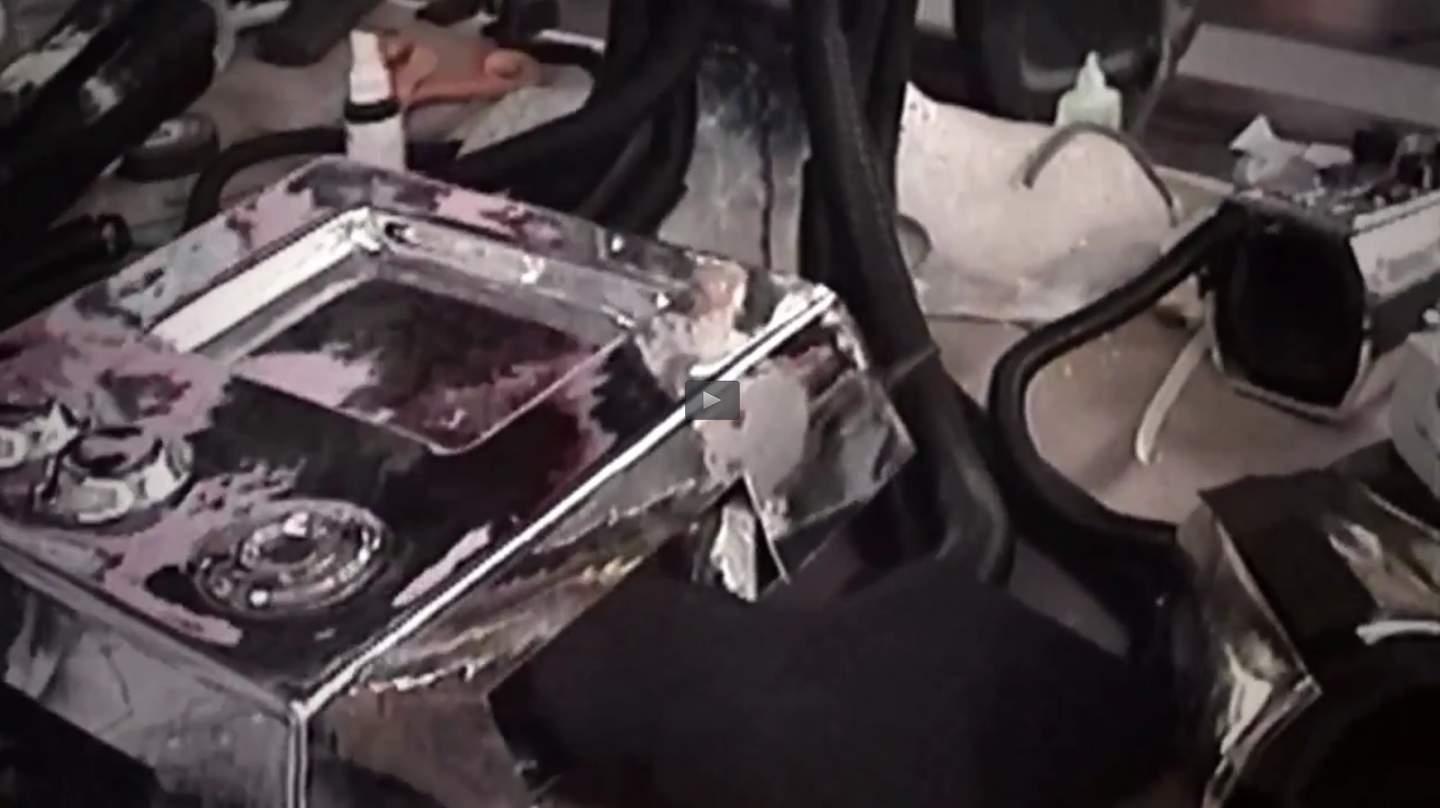
Here are the BEST reference photos I’ve found that show the inner and outer panels of the gauntlets. Thanks to Agent RayBans from the Daft Club forums and theRPF for helping fill in some of the missing pieces. In some photos the gauntlets appear to be on different arms. I will call them #1 and #2 for sake of clarity. I think the frames were symmetrical and reversible, since the greebles seem to flip when comparing promotional shots and videos.
![]()
![]()
![]()
![]()
The basic shape of the gauntlets is tricky to figure out because of the lack of reference material. It’s either a circle with a flat top and bottom or an octagon. The shape I’m aiming for is a rounded octagon. Each gauntlet will be two symmetrical parts with a pivot hinge mechanism that allows the user to slide their arm in. The two halves will be attached by supports that stretch, and the gap with be masked by neoprene or spandex material. I will try to match the original gauntlets as much as possible, compromising only where I need to make changes to fit actual hardware.
Here’s my build log:
September 7, 2015
I had an opportunity to present my Daft kit at Maker Festival 2015.
May 25, 2015
April 30, 2015
April 13, 2015
April 5, 2015
My raw, unmastered scratch built #Discovery Gauntlets. They are WEARABLE and FUNCTIONAL and MAY get loud. More to demo soon. #DaftPunk #arduino #3Dprinted #digitalfabrication #Alterian #AlterianInc #reprap #goesto11 #3Dprinting #craftyourfandom #wearables #AdditiveManufacturing #Makers A photo posted by Sunil John (@insultcomicdog) on
March 31, 2015:
Daft Punk 3D Printed Discovery Era ‘Style A’ Thomas V2 Ear Pucks from insultcomicdog on Vimeo.
January 9, 2015:
I said I was going to finish up the detail work on the helmet, but you can’t have a Daft Punk helmet without the gloves right?
Daft Punk’s original glove plates were created by using life casts of their hands and creating a sculpt on top of that. This technique allowed the plates to match the curvature of their hands perfectly. The sculpts were then vacuum formed with plastic and chromed to create the plates.
I’m working with a Daft builder from Brazil, Bruno Osti, to see if fabricating Daft Punk ‘RAM’ style gloves plates using a 3D printer is a viable option. Bruno modeled the plates in 3D, and I’m helping him with printing and test fitting on my hands.
These plates were pulled RAW directly off a Prusa i3 heat bed, and mounted temporarily onto my winter touch screen gloves which are much thicker than the final gloves will be.
The plates have a 2mm thick wall and were printed with supports in white ABS plastic. They will be easy to finish compared to the helmet and the ear pucks.
Traditionally prop builders still use life casts and vacuum forming to build gloves plate kits. The problem with this is that the gloves are only really custom fit to the original maker. Digital fabrication has allowed Bruno to scale his model to my hand (via a photograph) in Brazil, and let me fabricate them physically in my office in Toronto. If you have a 3D printer, the costs to fabricate these is negligible compared to tools and materials required for life casting and vacuum forming. 3D printing and the recent price drops of printing materials are game changers that traditional prop masters have to adapt to.
December 18, 2014:
I used one and two part molds, to cast the three 3D printed pieces that make up Thomas’ ear puck. The one part mold was the easiest to pour a cast from. The concave (inner) dome was the most difficult to cast, because I initially chose a poor location for the pour spout and air vents. The main hurdle for pouring resin is to avoid 90 degree overhangs, as that is where air bubbles like to hide. To produce defect free casts I poured a surface coating of resin in both halves of the mold to check for bubbles. If there were bubbles I was able to remove them carefully with a bamboo skewer. I then closed up the two part mold, tilted it on a 45 degree angle and poured the rest of the resin to complete the cast. The base of the puck was the largest piece to mold and cast. My problem with this part was that the mold took a long time to fill because of it’s shape and size. I had two defective casts which were the result of the resin curing before it had a chance to fill the mold entirely. The pot life (time in which you have to mix and pour the resin) of Smooth-Cast 300 is 3 minutes, so the only fix here was to reduce mixing time drastically or switch to a different resin that had a longer pot life.
I want to do as little finishing as possible with these casts before they are sent out to chrome. The masters were wet sanded at 1200 grit and had no defects. I will give these resin casts a light sand to remove the release agent that was applied during molding and they should be good for chrome.
I will now return to finish up the detail work (mouth and nose vents) on the helmet and prep it for a brush on mold.
Molding and Casting Daft Punk Discovery Era ‘Style A’ Thomas Ear Pucks from insultcomicdog on Vimeo.
November 12, 2014:
Here’s a little background information and reference photos I picked up from Agent Raybans and Bruno Osti on the Daft Club forums. The Discovery Era helmets had two different type of ear pucks. The main difference was the positioning of the smaller light ring.
The version I’m working on, which is what we’ll refer to as “Style A”, looks like this:

The Discovery ‘Lite’ Era helmets with the narrow LED matrix display, had a smaller light ring that was visible when looking at it from the front. In the “Style A” ear pucks, the smaller light ring can only be seen from the side, and is inset.
Traditionally prop builders lathe the ear pucks from MDF and cast them in resin. I’m don’t own a lathe and have no experience casting with resin yet. I decided to 3D print the ears on my Prusa i3. The original silhouette of the ear was modeled by Bruno Osti. I remodeled it into individual parts that could be 3D printed and house the transparent light disks. I considering acetone vapor method to finish them, but ended up using Bondo putty, spray filler primer and sanding to get the finish I need for casting and chrome.
Daft Punk 3D Printed Discovery Era ‘Style A’ Thomas Ear Pucks from insultcomicdog on Vimeo.
September 4, 2014:
I’ve made some progress on the helmet that will be holding all of these electronics. I built three different pepakura models before I figured out what scale helmet would be able to accommodate my head + hardware. Ideally the helmet should have been built and scaled to my body first, but I was impatient and excited to build the hardware first. After applying fiberglass to the helmet, I realized that some of my folds weren’t as sharp as they could be. I ended up building another visor and jaw and doing a transplant which set me back. Make sure you are 100% satisfied with your pepakura before applying fibreglass! Other builds have used Smooth Cast 300 as an alternative to fibreglass. This would have been a lot easier and cleaner to implement but more costly. I’m going to be applying bondo and sanding the helmet soon and will likely be stuck on this phase for a long time. Ideally the finish needs to be smooth enough to look good chromed. I’m trying to resist the temptation to cast this bucket.
September 3, 2014:
Toggling VU mode wirelessly from iOS via Bluetooth LE.
August 21, 2014:
Why use a chaser when you can do this? Rainbow cycle / VU meter ear puck lighting for my helmet.
July 14, 2014:
Thomas Temple EQs and side bars are complete. These were a lot more difficult and time consuming to build than the Thomas subvisor. I think I’ve discovered the reason why all the scratch Thomas LED builds I’ve seen don’t try to recreate the original helmet EQs and side bars. Without a custom PCB, point to point soldering is quite difficult due to the limited real estate on a prototype board. I’ve also complicated things with my interpretation of the Thomas EQs which use 5mm tri-colour common Anode LEDs with four legs. The actual Thomas EQs only use bi-colour blue/green LEDs. Do not attempt to build this circuit without a voltage meter or solder paste. I had two short circuits which forced me to back track. I advise building both panels in parallel if you value your sanity. I probably could have used larger gauge wire to allow a smaller overall footprint, but I prefer the stiffness you get with 22 AWG that allows you to bend and position hook up wire into small spaces. If you manage to complete this, you’ll likely never want to have to build another set again. Another challenge with this build is diffusing bar LEDs properly so they don’t appear as spot lights behind coloured gels. I borrowed some diffuser ideas from R2-D2 builds, using reflective tape a Mr. Clean magic eraser.
Daft Punk – Thomas Bangalter Temple EQs / Side Bar Build Log from insultcomicdog on Vimeo.
May 17, 2014:
This is my progress so far on the helmet subvisor. It’s currently capable of rendering animations and visualizing sound via microphone input. Next on deck are the temple EQs, light bars and ear puck lights.
Daft Punk – Thomas Bangalter Subvisor Build Log from insultcomicdog on Vimeo.
[embpicasa id=”6011412263576052945″]

Sunil John | Maker Festival 2015 – DIY Daft Punk
Sep 2, 2015 -
[…] Toronto Reference Library. I was one of a hundred makers, presenting “DIY Daft Punk”. This project replicates the Daft Punk’s Discovery Era Thomas helmet and Discovery gauntlets, using a […]
thomas and manuel
Dec 7, 2017 -
can you put the helmets with leds and gontlet for sale are you selling it because its difficult to make them both
thomas and manuel
Jan 22, 2018 -
how much xd
MV
Oct 29, 2018 -
Hello,
I’m going to build one for me, I’m wondering if it’s possible to have your files, stl, schematics…please.
I have a lot of them but some different pieces.
Thanks in advance
Here is my email vivmilljcb@gmail.com
Best regards
Tracy Young
Nov 27, 2019 -
Same here I am making the same thing can you give me the files schematics and
Codes you used? Thanks.
Tracy Young
Nov 10, 2019 -
Hello, I am also making the Daft Punk Thomas helmet and Gauntlets from Discovery. I can’t find any 3D print files and am not a very good coder. Can you send me any files, schematics, and-or codes you used? If yes, pesetas send to tarheelwinetraders@gmail.com. Thank you in advance.
TY
Nov 10, 2019 -
Can you also send me the files, schematics, and codes you used. Send to tarheelwinetraders@gmail.com
Tracy Young
Nov 16, 2019 -
Helo. May I also have the 3D print files and schematics? I am making the Thomas Bangalter discovery helmet and gauntlets but can’t find any 3D print files. Thanks just in case. tarheelwinetraders@gmail.com
Z Y
Apr 18, 2020 -
Hi. Can you send me or allow me to buy the 3D print files and program libraries you used for this build? Thanks!
ZY
Apr 27, 2020 -
I’m also going to build one, is it possible to get your files, stl, schematics. I mostly need the gauntlets, inner ear parts, and programming for the matrix. Thanks